This page preserves a member-submitted teardown guide from the original KermitAirgunClub.com, a Kermit, Texas airgun club site active until it went offline. It was originally shared as a Word document with embedded photos; both text and photos are reproduced here as written. If you're the original author and would like something removed or credited differently, contact info@airgunguide.com.
First off, I am no air gunsmith! I am however mechanically inclined and the proud owner of a RWS model 94 .22 break barrel air rifle. I am just writing an article on the teardown and rebuilding of the rifle at hand. I will be installing the Maccari RWS94 spring and the Apex seal, plus adding some moly and heavy tar to the inner workings of the gun. I thought I would do this just as a guide for those who have no clue or wanted to see the inside of this particular gun. There are similar articles on this gun, but none I have came across show the pictures I wanted to see of the guns inner workings. This is just a guide, so those who are pro's easy on me as I'm sure there will be things I didn't point out that you would!
Here's my spring compressor, didn't cost a penny! I got most the stuff out of the scrap hopper at work, the rest I had in the garage.
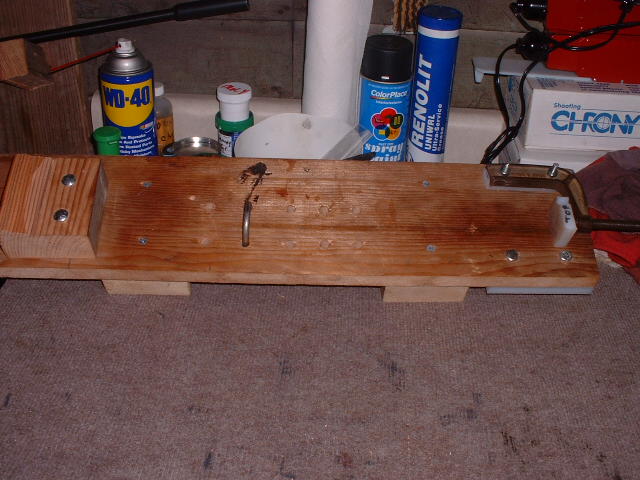
First thing, a spring compressor should be used for your safety! Remove the forend screws from each side of the stock, then the screws on the trigger guard. (I keep a small bowl handy to put the small screws and parts into.) The action should separate from the stock. Now take out the small screw at the pivot bolt and then the large pivot bolt itself. Separate the breech, cocking arm and barrel assembly from the rest of the gun and set aside. Keep an eye on the washers on the breech so they don't fall away and end up lost on the floor. Now a spring compressor is used to push the trigger block in and remove the pin to release the inner workings from the compression cylinder. First make sure the stock securing bolt in front of the trigger is removed before applying pressure to the end of the trigger block. Now, apply pressure to the block so as the retaining pin can easily be removed, not much pressure is needed. Once the pin is removed back off the compressor a little to remove the trigger block and spring along with the piston and seal.
Here is everything out in the open.
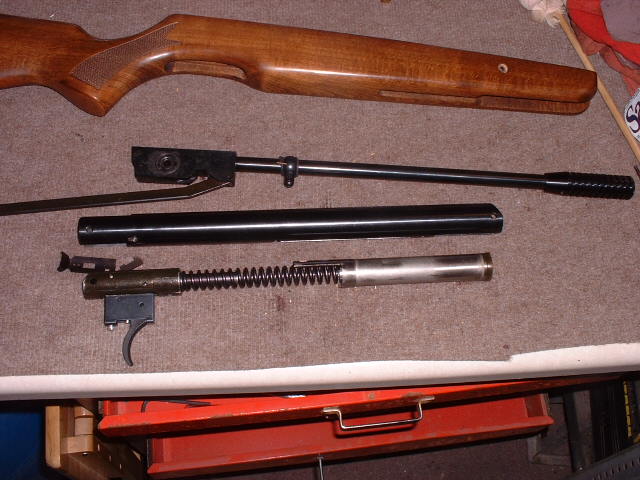
Here is what the RWS 94 contains in the power plant.
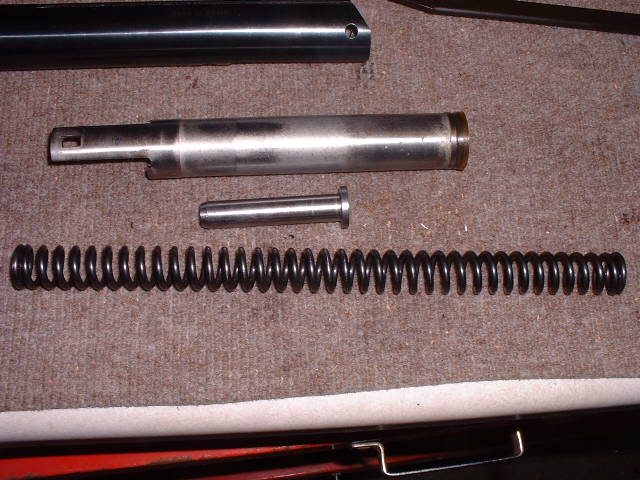
Inspect and clean everything, especially check the seal and cylinder for damage and metal shavings. Clean cylinder and de-burr sharp edges, use an air compressor to blow away loose shavings.
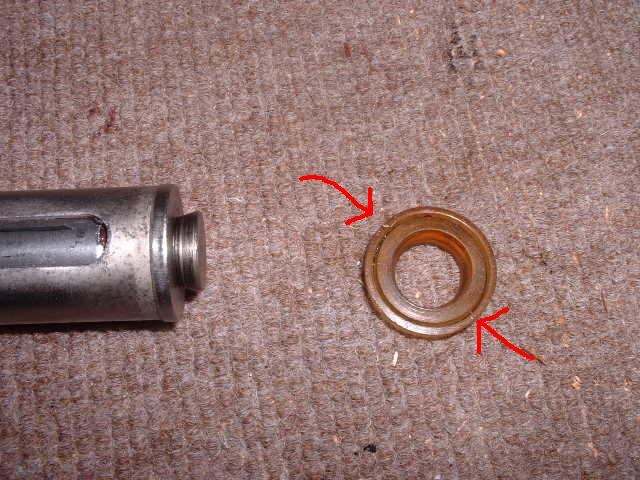
Above is my original seal, there was metal shavings embedded where the arrows indicate. Yikes!
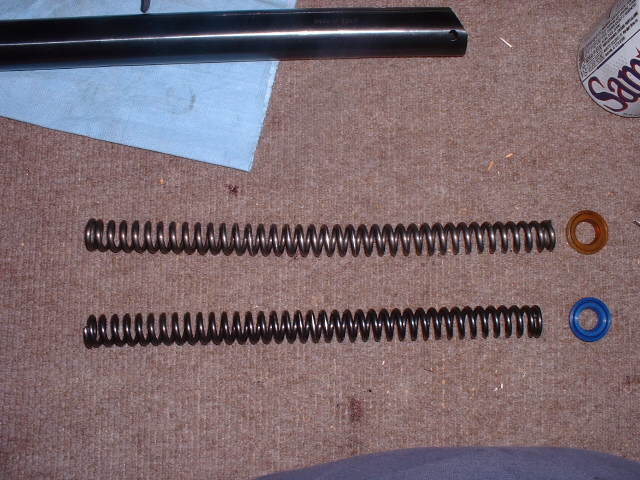
Top: original factory spring and seal (spring has some cant). Bottom: Maccari RWS 94 spring and Apex seal.
Now where ready to clean the components of the gun and replace the spring and seal. Here I have Heavy Tar on the Maccari spring, I'm holding it with a wooden dow rod. (this stuff is messy)
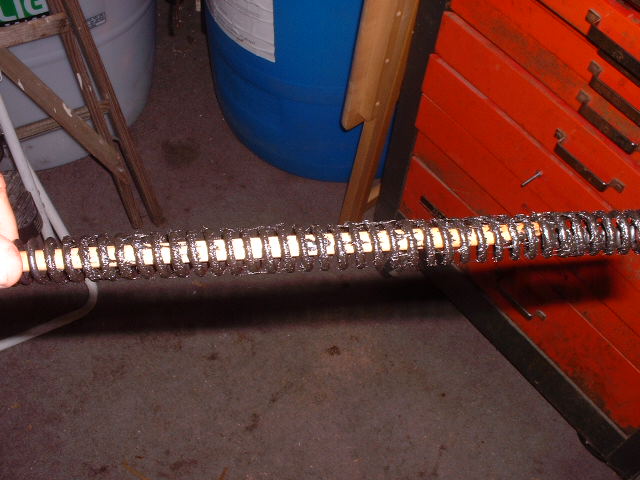
Don't over apply the tar or velocity could be affected and hender the full potential of the spring.
Next I've cleaned and applied moly to the piston ends, cocking arm slide and tophat. Also I applied moly on the spring ends after polishing with 440 grit sand paper. Don't put moly on the seal, use a light coat of dielectric silicone grease on the edges and face of seal instead.
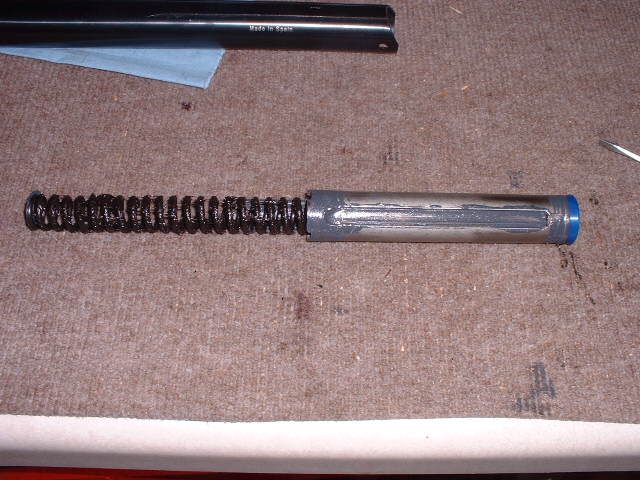
I didn't mess with the trigger, I thought it was fine, tho do remember to reassemble the safety switch correctly prior to putting it back on or it won't work! Believe me I know!
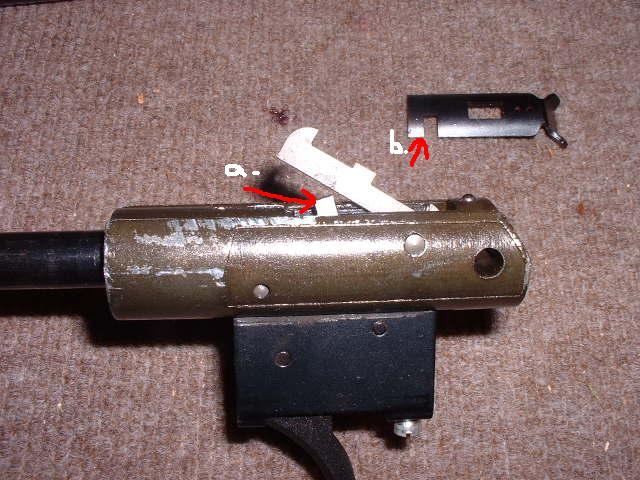
The little safety arm (A.) has to go in the notch on the safety switch (B.). The arm wants to fall down in the trigger block sometimes, so be cautious here or else, your safety won't work after everything's back together!
The spring guide needs moly also, it's sticking out of the trigger block. The red arrow points at the spring guide, moly is applied here to reduce wear and drag when the spring is compressed down over it.
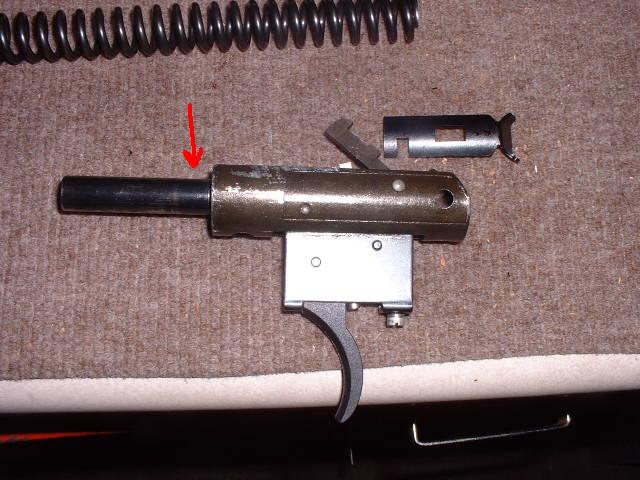
Now put the piston and spring back in the cylinder and insert the trigger block, remember the safety switch I told you about! Insert the pin into the trigger block to secure it. Here I didn't need the compressor, I just stood the cylinder on its end and pushed down until the trigger block was in place and inserted the pin. Now screw the stock securing bolt back in the trigger block. Now it's time to moly the breech block and pivot washers. (A.)
The red arrow show the area to apply the moly, make sure and do both sides (A.), and the lock-up stud (B.) inside the breech forks.
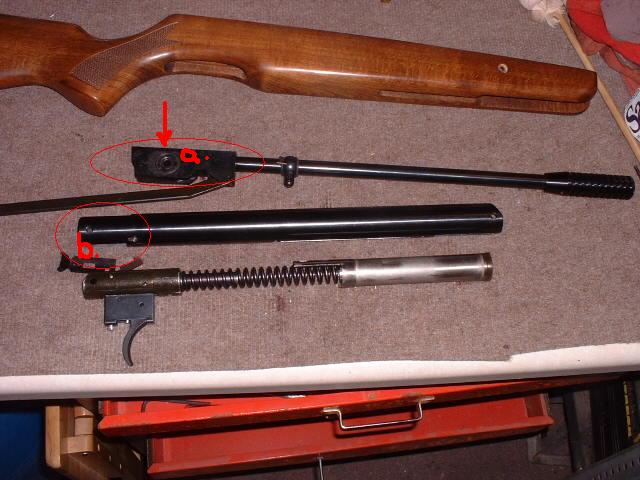
Now take out the pin that holds the cocking arm in the breech block and set the arm and pin aside. Take the breech block along with the attached barrel and put it back in the forks of the receiver and put moly on the pivot bolt just before screwing it back in firmly, next put the small security screw in beside the pivot bolt to keep it from loosening up. Once the breech block is back in place you can know put the cocking arm back on. First, turn the arm so it slips back in the piston slide hole under the receiver and line up with the breech block. You might need to cock the barrel slightly to line up the cocking arm with the groove and hole in the breech block, now slip the pin back in to secure the arm to the block.
Now the action should be reassembled and wiped down, then the stock put back on, don't forget to replace all the stock screws firmly with the right size screwdriver blade or you'll slip and booger the screw heads up. Well that's it, just remember to check all the screws periodically and shoot safely, I'm sure there's some stuff I left out, but after all this is only a guide and I'm only an amateur. Cheers!
Beef75j
Tags
RWS 94 tune · spring piston · Maccari spring · Apex seal · moly · heavy tar